Monday, 11 April 2011

Inspiration week 1: Elsa Billgren

I thought I'd start a little series where I'll post about people who inspire my sewing someway. My first inspiration comes from Sweden; Elsa Billgren has a fashion blog where she posts about her outfits and daily activities. The blog has nothing to do with sewing per se, but I find Elsa's style totally inspiring. Why? Because she has a wonderful dress closet filled with vintage creations! Everytime I visit her blog I wish there was a magic wand that could take me straight way to Stockholm and those wonderful vintage stores. Next time that I'll visit Stockholm I'll definitely find all the stores Elsa has shared in her blog! Just take a look at all these lovelies, wouldn't you like to get your hands on these too?


All pictures from Elsa Billgren's blog.

My favorite is the blue and white one with stripes AND polka dots. I want that fabric!

You can find Elsa and her wonderful dresses at: http://elsa.elle.se/ The blog is in Swedish but the pictures aren't!


P.S. Doesn't she look a little like Joan Holloway?


Edit: I added some new features to the blog. I labelled all posts so you can find them more easily, and now you can share posts in Facebook or Twitter!

***

Ajattelin aloittaa uuden viikkosarjan, jossa esittelen ihmisiä, jotka inspiroivat minua. Ensimmäisenä vuorossa on ruotsalainen muotibloggaaja Elsa Billgren.

Friday, 8 April 2011

The overly sweet Pink Dress

I finally succeeded in taking some pictures of yours truly! You can't believe how difficult that is in my supersunlit apartment! (Yes it's sunny today! Yay!) I started on the dress two weeks ago, and it's been on the verge of being ready. And now it is, finally! I ended up shortening the sleeves by 4 cm but otherwise the dress is pretty much like the pattern suggests. I think next time I'll lengthen the bodice by 2 cm though, just for a better fit. It turned out supersweet, and I started to worry that it might be a little too sweet for 26-old me. Luckily I had just the cure, a metallic Armadillo belt! So here it is, my new heatwave worthy dress:

This dress desperately needs to be worn during a heatwave.
I'm pulling the fabric, that's why it looks so funny at the back.

Shoes from H&M. I'm in love with these shoes, if only my feet shared that love, sigh..
Armadillo belt from Zara. It reminds me of those old westerns with John Wayne, although he propably never wore belts with flowers on..

I have another dress on the sewing table. It's actually the muslin for the wiggle dress from an earlier post. The muslin started to look so cute, that now I'm thinking of finishing it up.

 ***

Kesän helteitä on mukava odottaa, kun kaapista löytyy nyt ihanan kevyt ja suloinen puuvillamekko!

Thursday, 7 April 2011

Quick post on another grey day

It's grey and rainy again. I had a terrible desire to just stay at home and do some schoolwork and sewing. Luckily though, I found myself without coffee (catastrophy!) and so I stepped out for a nice walk to town. And as I came to the river (I live right by the Aura River) I was greeted by running water! Just a few days ago the river had ice cover and now it's all melted away! How I love spring! Anyway, I carried on and went to get the buttons (and some zippers) from the fabric store. I came home and found a brown envelope on my door step. Inside were these lovely vintage buttons I ordered just last week, now how quick was that! I got these from LillianOlive  that carries a large array of buttons of all sorts. I'll definitely go there again! I already know where I'll use the brown buttons, but the others will have to wait for a suitable project.

Look how wonderful! Heather had added those little pink buttons in the parcel as well, how sweet!

And I finished the Pink Sweetness Dress! I'll post more pictures on that tomorrow.

Seven little buttons all finally sewn.

Wednesday, 6 April 2011

Grading a wiggle skirt

I got one of the Etsy patterns I've been waiting for yesterday and since it's been a grey day weatherwise I thought I'd skip getting the blasted buttons (you know of what I'm talking about lol). The pattern I got is a classic 60's wiggle dress. Wiggle dresses are something that I remember always wanting to wear (the other is an Edwardian dress). A wiggle has been in my dreams, but I haven't been able to find a ready-made because of my shape. I can't count all the times I've spent drooling over some sheath dress to only notice that if the bodice fits the bottom won't. And vice versa. And to have a friend who can fit into any sheath or wiggle she pleases has made me a teensy bit cross with the ready-made dresses. How lucky then that I've found the world of vintage sewing! I now have wiggle dress patterns and the resources and means to make them mine!

The new wiggle.

The problem that I have with fitting in sheaths or wiggle dresses is that I have a relatively small waist compared to my hips. I'm also a bit pear shaped, so buying patterns by bust size doesn't equal a fitting bottom part pattern. This was my first try in grading a bottom piece and it turned out okay. I think the bottom could fit even better if I took out a few more centimeters of the sides, but for a first wiggle (and a wiggle walk!) a little room is fine by me. I did the muslin as neatly as I could, cause I'm planning on maybe making a wiggle dress for my graduation (when ever that day comes). So I thought it was a good idea to rehearse the whole thing all the way through in cotton (I have a nice thrifted lavender satin waiting in the stash for the fancy wiggle).

The pattern I started out with had a bodice one size smaller than mine, so I knew that the bottom wouldn't fit me at any will without alterations. I measured the skirt pieces and checked the room that the pattern had in the hip area. I then compared that measurement to my own hip measure and figured the amount that needed to be added. On the first muslin the skirt was way too big. I noticed that I only needed to make additions in width to the back piece and none to the front (this was a kind of bittersweet moment lol). Because I'd used a fabric I didn't want to waist (and cause I was feeling lazy) I took the extra centimetres from the centre front of the skirt. I than had to move the pleats too but for me this was nothing compared with having to take the whole skirt down. So the skirt now has one seam more than the pattern, but since this is a muslin, I don't really mind it. Because I wasn't so sure if the grading was accurate I didn't take pictures of the grading process. So here's a miniature version on paper (Gertie does these and I love them!) of the changes I did on the back piece of the skirt (I apologize in advance for the poor English on the paper bits, oh brother..). The changes are only to the back piece of the pattern, but I think the same goes for the front parts as well. Also, this grading changes only the hip measurement, the waist stays the same. I figured this grading style on my own while rummaging through my head for some basic pattern alterations I've seen and read about, so if you know of a better way to do this, please do let me know!


First, trace your pattern on another paper, you'll need the original later! Measure the distance from your waist to your hips' widest part, for me this is 25 cm from the natural waistline. Mark that distance on your pattern. If your making changes on both the back and front pieces, measure the distance for the patterns separately, as the distance may vary at the back than at the front. The line is illustrated here with the broken line. The left side of the pattern is centre front, the right the side seamline.


Cut along the grain line arrow almost to the top of the pattern, but don't cut it all the way. You can stop at the seamline if your patten has a separate cutting line. Be sure not to cut into the darts.


Add the needed amount of hip ease to the marked line. For me this was 4 cm. Add the amount by parting the pattern pieces 4 cm (for me) at the marked line. Secure the opening, I used scotch tape and a piece of pattern paper.


After you've widened the hips you'll see that the hem is now too wide for a wiggle skirt. We need to make it wiggle!


The opening of the slash would need to be 4 cm (for me) to keep the skirt in its original form. Because we can't take the measure from the slash, we'll take it from the sideseam instead. To know how much needs to be taken away, measure the gap in the hemline. Substract 4 (for me) from that number. The result is the amount you'll need to take away from the sideseamline. Measure the amount (7 cm for me) from the sideseam and mark it.


The new broken line shows the new sideseam. It starts at about the point where you added the hip measure and stops at the hemline where you made the substraction. Cut the extra off but without any sharp corners at the hip. Remember to make new seam allowances to your new sideseam!


After this you'll need to straighten the hemline. Draw a new hemline in a right-angle from the centre back line and matching the sideseam. Cut the extra off.


 Now you need the original pattern by your side. You'll need to draw a new waistline and replace the noches so that they match the front skirt pattern.


 Place the new pattern on top of the old one. Trace the notches from the old pattern to the new one and draw the waistline along the waistline of the original pattern piece.


 And now youre done! The hip has been widened and the patten has been made in to a wiggle once more! Hurraa!


I didn't make any changes to the bodice pieces, although next time I'll propably add another 1 or 2 cm of length for a more comfortable fit. I've found that with vintage patterns I can go down a size in fitted bodices and more on loose bodices because the seam allowances are bigger than I'm used to. I usually sew with a 1 cm allowance, when the patterns suggest 1,5 cm. So I get room from that difference to my bodice pieces. 

***

Tämän sateisen ja harmaan päivän ohjelmana oli uuden mekon kaavojen muokkaus. Kapeahelmaiset mekot ovat aina olleet minulle hankalia, koska niiden malli ei valmisvaatteissa ainakaan salli kurveja, ei sitten ollenkaan. Koska itselläni on suhteellisen kapea vyötärö verrattuna lanteisiin, on sopivien kotelomekkojen ostaminen mahdotonta. Onneksi kaavoja muokkaamalla nämäkin mekot ovat nyt käden ulottuvilla! Teen ajan salliessa tekemistäni muutoksista myös suomenkielisen version.

Tuesday, 5 April 2011

A Side Project called the Belt

I've been a good girl and done a bit of my thesis. I've also been entertaining my sister and niece and friends. Therefore I didn't get any sewing done this weekend. And I'm still waiting for those last two buttons so I could finish the dress. But I got a terrible urge to do at least some sewing. So I remembered that I had some fabric left over from when I reupholstered six of these old chairs that once belonged to my great-grandparents:

Old one on the left, new on the right.

I was looking for a fabric for these chairs with my friend and she found this beautiful piece for me! And it was for sale! The flowers and motives on that fabric are just screaming ME; I have a similar motive on a curtain as well. Anyhoo, so I had some fabric leftover. And since Casey posted not long ago a great tutorial on self-fabric belts, it was a done deal! I did do some things differently, but the end result is basically the same.

This is what I started out with. A thrifted belt buckle and some leftover fabric.

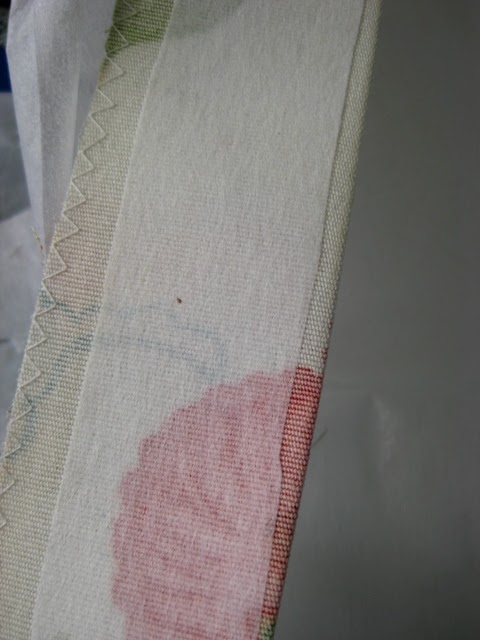
I started out by cutting two 10 cm wide fabric strips from the fabric to make the belt 4 cm wide. I left 1cm on each side for the seam allowances. I had to cut two strips because there wasn't enough fabric for one long strip. I did alter the length after I'd sewn the pieces together, it was easier for me that way. I then zigzagged the edges and sew the pieces together. I folded the strip in half and added some interfacing to the other side. I used interfacing because I haven't found the stiff belting that Casey uses. It helped that the fabric was so thick though. I therefore also didn't make the seamline in the middle of the strip but in the other long side.

Zigzagging away.
Some crroked interfacing.
I double-stiched the pointed end of the belt to secure it.

The fabric, just to give an idea of its thicknes. It is after all meant for furniture.

The teadious part: turning the belt inside out.

All turned and waiting for the iron.


I topstiched the upper side to keep the belt from wiggling.
I added some poppers like Casy to keep the ends in place.

Finished! And all in about an hour!


***

Koska sormeni syyhysivät päästä viikonlopun jälkeen taas ompelemaan ja koska en ole vielä saanut aikaiseksi hakea niitä kahta viimeistä nappia söpöilymekkoon, päätin käyttää hyväkseni vanhoja kangasrippeitä. Päällystin kuusi vanhaa tuolia vähän aikaa sitten ihanaisella kankaalla. Kangasta jäi hieman yli ja ajattelin tässä olevan mainio tilaisuus opetella kangasvyön tekoa. Käytin samalla yhden kirpparilta löytämäni vyösoljen. Työhön meni runsas tunti ja nyt on kaapissa kauniista kankaasta tehty vyö, joka piristää mukavasti mekkoa kuin mekkoa!

Friday, 1 April 2011

Scandinavian fashion in 1894

While waiting for the 70's dress to get finished I thought I'd share some prints from an old fashion magazine I snapped up a while ago. Fashion magazines in the 19th century were scarce in Finland due mainly to the fact that the number of women in high class (and therefore the only ones who could afford these assembles) was minimal. Only the largest cities hosted people and sewists who were able to make these dresses. The Iduns Modetidning was a Swedish fashion magazine that was read also in Finland (Swedish and French were the languages of the high class, Finnish was for common people). I've tried to read the magazine but can't understand it completely, the oldish Swedish and the old terminology doesn't make it any easier (lol). But we can always admire the pictures! So here's a flashback to the fashion of December 1894 in Scandinavia:

"Scandinavian's biggest, most elegant, most modern and cheapest fashion magazine."


Princess dress with a velvet brace.

Round hat with embroidered brim.

Collars with embroideries and pleating.

Promenadedresses.

The Primcess dress from behind.

Dresses for social occasions.


Children's coat and shirts.

Dresses with soutache and velvet embellishments.
As a modern woman who barely manages a handpicked zipper, these dresses witht their incredible details are from another world. Which of course they are. I do feel a bit sorry for all the sewists who made these dresses and who propably never got to wear these themselves. And on the another I feel sorry for us, who no longer no how to make these dresses with their rich embellishments.

Thursday, 31 March 2011

Done with the sleeves, on with the buttonholes

I got all the machine sewing done today with my 70's Sweetness dress. The sleeves that I was a bit terrified to set in (propably because of the misfortune with the Swing Dress) actually went in without any problems. That is I only had to undo one little bit of the other sleeve seam because I had sewn it together with some bodice fabric (lol). 

Setting the sleeves with my trusted Jack the Seam Ripper by my side.

I sew the skirt pieces together and how easy what that! The skirt is a dirndl skirt so there was two rectangular pieces to sew together. After that it was time to gather the skirt waist and attach it to the bodice pieces. The gathering took some time because there was so much to gather, but in the end the seams were sewn together nice and neat. So after finishing the last zigzag seams on the skirt and bodice there's only handsewing left to do. 

Gathering the skirt.

I sew the side zipper in by hand to get a bit more practice on that technique. And then I started sewing the buttonholes. My intention was to follow Sunni's tutorial but in the end I followed the instructions from an old Finnish sewing book. The instructions are basically the same, but they don't require any special threads or gimps. I ended up using a double thread to ensure that the stiches were neat. I started at the bottom of the bodice because I figured that the first ugly ones would be easily covered with a belt and the last perfect ones would be the ones in the spot light (lol!). I've done three now, and it seems that it will truely become a line of evolution in button hole binding.
Handpicked zipper needing some ironing.
The evolution of the buttonholes. The best one so far on top.

The thread I used in the buttonholes is a find from my granny's stash. It's a 100 per cent cotton thread called "Rosethread" by Vaasan puuvilla. The factory was closed in 1964 but the thread is like new.
***

Mekko edistyy kovaa vauhtia ja enää jäljellä on käsin ommeltavat viimeistelyt. Sain tänään tehtyä hihojen istutuksen ja hameen poimutuksen ja yhdistämisen yläosaan. Vetoketjun ompelin jo käsin ja läpinlävet ovat työn alla. Lisäksi aion viimeistellä hihat ja  helman käsin totuttuun tapaan. Käytin lapinläpien ompeluun vanhan käsityökirjan ohjeita: